
Those who love to automate small tasks for ease and efficiency will find this article interesting and useful. I have written this article for BOSS users but should work for most of the other Linux Distributions.
Your data is precious. It is often necessary to save sessions of your work in order to preserve your data.
On one fine morning your hard disk crashes. Sometimes you may accidentally delete a folder which contains your years of work.If you have no backup of your work then you are left with nothing. Even if you are ready to work again it may not be practically possible.If you have decided to keep backup of your work on periodic basis or if you are already doing so then this article is for you.

Taking backup of your folder takes time, especially when it has large number of files. To copy the folder quickly, it is a good idea to compress the folder and then copy the compressed file to pen drive. Also in every backup session, you may want to give different name to the compressed file.
In the first part, we learn how to do this using linux shell (Terminal). Then in the second part we will learn how to put these commands in a script file and run the script file. In the final part, we will create a link (shortcut), assign an icon to this link and put this link on desktop. Ultimately you can take your backup by just putting your USB in the socket and double clicking this icon.
The file manager in BOSS is called as Nautilus. Clicking home icon you can start nautilus
Another way of starting Nautilus is Applications->Accessories->Files.
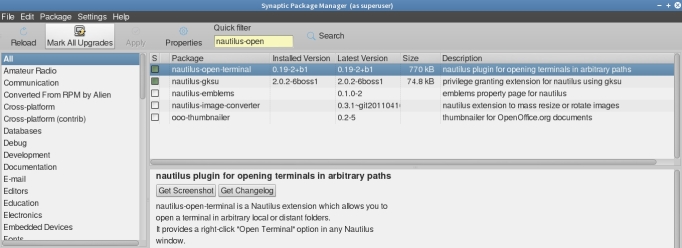
Before we start our tutorial, I would like you to install nautilus-open-terminal plugin. This plugin allows us to open the terminal at the folder opened by Nautilus. Please install nautilus-open-terminal plugin from Synaptic Package Manager.
Now we to start our automation. First we need the absolute path of the working folder. Using Nautilus, go to working folder and open terminal there by File->Open in terminal.
To compress the whole folder, we need absolute path of this folder so give command $readlink -f . (readlink with options dash f and dot)
This gives me the absolute path of my current folder as /home/Important/44-HTML Your path will be different. Select this path by mouse, right click and copy to clipboard.
Now close the terminal and reopen it. This ensures that default terminal folder is opened. Now test the compress command tar on the terminal. You may use right click and paste path at proper place.
$tar -czf test.tar/gz /home/Important/44-HTML
Ignore the warning… tar: Removing leading `/’ from member names
List the current directory by $ls You will find the compressed file test.tar.gz created in the current folder. Now plug the USB and open the terminal on USB, using Nautilus. Note the path by $readlink -f . My path is /media/Milind Milind is the USB label. This is the target path. Go to terminal default directory where your test.tar.gz lies. Then try the copy command …
$cp test.tar.gz. /media/Milind
The file should be copied to usb drive. In short we have done the following .
- Get source path using readlink.
- Get target (USB) path using readlink.
- compress source path by tar command.
- copy tar file to target (USB) path.
This completes the manual test part. We are now ready to automate the whole task by giving all these commands through a script file in the next part BOSS-LINUX, Backup Script-II
Author’s Email : oak444(at)gmail(dot)com
